Starting point: zero smart devices. End goal: a fully automated home for under $500. Every step, mistake, and money-saving decision — documented honestly so you don’t have to learn the hard way.
I want to start with the mistake I see almost everyone make.
They walk into a Best Buy, or they fall down a YouTube rabbit hole at 11 PM, and they get excited. Maybe it’s the demo unit showing lights changing color with music. Maybe it’s a video of someone unlocking their front door from an airport in another country. Whatever it is, something clicks, and they decide: I want that. I want a smart home.
And then they buy the thing that excited them. A color light bulb. A video doorbell. A robot vacuum. Maybe all three in the same weekend.
Three months later, they have three apps on their phone, three devices that don’t talk to each other, a Wi-Fi network that struggles every time all three run simultaneously, and a vague sense that smart home technology is more complicated than it looked on YouTube. The video doorbell sends 40 notifications a day. The color bulb lost its connection twice this week. The robot vacuum has been sitting in its dock for two weeks because setting up the no-go zones is still on the to-do list.
This is not a smart home. This is a collection of smart devices with no strategy behind them.
This guide is the strategy. We’re going to build a real smart home — one that actually automates things, that responds to how you live, that gets smarter over time — for under $500, in a sequence that makes every purchase build on the previous one. We’re going to do it without wiring, without an electrician, and without a computer science degree.
By the end, you’ll have a home that wakes up when you do, knows when you’ve left, adjusts its own temperature, monitors your front door, and turns itself off when you go to sleep — all without you touching a single switch.
Let’s build it properly.
Before You Buy Anything: The Three Decisions That Determine Everything
There are three decisions you need to make before purchasing your first device. Get these right and every future purchase becomes easier. Get them wrong and you’ll spend the next year fighting compatibility issues.
Decision 1: Choose Your Ecosystem
A smart home ecosystem is the platform that ties your devices together — the central nervous system that lets your thermostat talk to your lights, your door lock talk to your security camera, and all of it respond to your voice or your phone.
The three major ecosystems in 2025 are:
Amazon Alexa — the largest ecosystem by device compatibility. More third-party devices are “Works with Alexa” certified than any other platform. The Alexa app is functional and regularly updated. Alexa routines are powerful and relatively easy to build. The limitation: Alexa is a cloud-first system, meaning most commands route through Amazon’s servers, which introduces slight latency and means your automations technically stop working if your internet goes down.
Google Home — the strongest choice if you’re deep in Google’s world (Android phone, Gmail, Google Calendar). Google Home’s integration with Android means presence detection — automations that trigger when you leave or arrive home — works more reliably than on any other platform. The app has been redesigned significantly and is genuinely good in 2025. Device compatibility is slightly narrower than Alexa’s.
Apple HomeKit — the privacy-first choice. HomeKit processes automations locally on your home network rather than sending everything to Apple’s cloud, which means faster response times, no dependency on internet connectivity for local automations, and stronger data privacy. The limitation is the narrowest device compatibility of the three platforms — many budget-friendly devices don’t support HomeKit — and it works best if your household is exclusively Apple devices (iPhone, iPad, Mac, Apple Watch).
Our recommendation for most beginners: Start with Alexa. The widest device compatibility gives you the most flexibility as you build, the Echo line of devices provides an excellent entry-point hub, and the Alexa routines system is approachable enough for beginners while powerful enough for advanced users.
If your entire household is on iPhones and you care deeply about privacy, choose HomeKit and budget slightly more for compatible devices.
Decision 2: Understand Matter (And Why It Changes Everything)
Matter is a smart home connectivity standard launched in 2022 and now supported by Amazon, Google, Apple, and Samsung SmartThings. It’s the industry’s attempt to end the compatibility fragmentation that has frustrated smart home users for years.
In practical terms, a Matter-certified device works with all four major ecosystems simultaneously — no choosing, no compromises. You add it once and it appears in your Alexa app, your Google Home app, and your Apple Home app at the same time.
For beginners building a smart home today, the rule is simple: when two devices are otherwise equal, choose the one with Matter certification. It future-proofs your investment and eliminates the ecosystem lock-in that has made smart home upgrades frustrating for years.
Look for the Matter logo on device packaging, or filter by Matter compatibility when shopping on Amazon.
Decision 3: Audit Your Wi-Fi Network First
This is the step nobody talks about in beginner smart home guides, and it’s the most common source of ongoing frustration for new smart home owners.
Smart home devices are Wi-Fi clients. Every smart bulb, smart plug, thermostat, camera, and sensor you add to your home is a device on your Wi-Fi network. A typical starter smart home setup adds 10–20 new Wi-Fi devices. A full setup can add 40+.
Most ISP-provided routers — the router your internet provider shipped you — are designed for 5–10 connected devices. If you’re already running phones, laptops, a smart TV, and a game console, you may already be near that limit. Adding 15 smart home devices to an overloaded router is the fastest way to create a smart home that’s constantly dropping connections.
Before buying your first device:
Check your router’s age. If it’s more than 4 years old, or if it’s the router your ISP provided when you signed up for service, it’s probably time for an upgrade. A mesh Wi-Fi system — we recommend the TP-Link Deco XE75 or Eero Pro 6E — will handle a full smart home setup without strain and cost between $150–250 for a system that covers most apartments and homes.
Create a separate IoT network. Most modern routers allow you to create a guest network or a secondary network. Put all your smart home devices on this network, separate from your phones and computers. This improves both performance and security — a compromised smart home device can’t access your main network if it’s on a separate VLAN.
Check your 2.4GHz coverage. Many smart home devices — particularly sensors, plugs, and older smart bulbs — only connect on 2.4GHz Wi-Fi, not 5GHz. Make sure your router has strong 2.4GHz signal in every room where you plan to place smart devices.
Getting your network right before adding devices saves enormous frustration later. Consider it the foundation your smart home is built on.
The Build: Phase by Phase
Now we build. We’re going to do this in five phases, each with a clear purpose and a specific budget. The phases are designed so that each one adds value on its own — you don’t need to complete all five to have a working smart home — but they build on each other logically.
Total budget: $470
Here’s how it breaks down:
| Phase | Focus | Budget |
|---|---|---|
| Phase 1 | Voice Control Hub | $50 |
| Phase 2 | Smart Lighting | $80 |
| Phase 3 | Smart Plugs & Energy | $40 |
| Phase 4 | Front Door Security | $120 |
| Phase 5 | Climate Control | $180 |
Phase 1: The Voice Control Hub
Purpose: Give your smart home a brain and a voice interface.

- Make your Echo Dot portable with the Mission Battery Base.
- Design blends elegantly with Echo Dot without compromising audio performance.
- Accessory specially designed to work with Echo Dot (4th Gen). Echo Dot sold separately.
Every smart home needs a central point of control — a device that connects to everything else, understands voice commands, and runs automations. For a beginner on a budget, an Amazon Echo is the right starting point.
The Echo Dot (5th Gen) at the lower price point is the one we’d recommend for most beginners. It’s small enough to place anywhere, sounds better than previous Dots (there’s a genuine woofer now), and has the same Alexa capabilities as the full-size Echo. Place one in your most-used room — typically the kitchen or living room — as your primary control point.
What to do in Phase 1:
Download the Amazon Alexa app and set up your Echo. During setup, you’ll create your smart home’s “home” in the Alexa app — give it your address, connect it to your Amazon account, and give your device a room name. This takes about 10 minutes.
Then spend time in the Alexa app before buying any devices. Navigate to the Devices tab and explore the interface. Look at the Routines section — this is where the real power of your smart home will live. Understand the layout before you populate it with devices.
Your first automation: Set up a Good Morning routine right now, even before you have any smart devices. Go to Routines → Add Routine → Schedule and set it to run at your typical wake-up time. Add an action: Alexa Announcement. Have Alexa say your weather, your day’s calendar events, and the time. This costs $0 and teaches you the Routines interface before you have devices to manage.
Pro tip: If you have multiple rooms you want to control by voice, buy Echo Dots for each room rather than one expensive Echo Show. Multiple Dots in multiple rooms costs the same as one premium Echo and gives you voice control everywhere.
Phase 2: Smart Lighting
Purpose: The most visible, most satisfying smart home upgrade. Lights that respond to time of day, presence, and voice — without ever touching a switch.

- Multicolor & Auto White: Dimmable 16 million colors and 1000 lumens warm to cool whites(2500K-9000K). Set your bulb to a…
- Voice Control: Get hands-free control of your lights with your voice via Amazon Alexa or Google Assistant. Perfect for t…
- Remote Control: Control your smart light bulb from anywhere with your smartphone using the free Kasa smart app (iOS, And…

- App-Guided Install: The Kasa or Tapo app guides you through step-by-step setup. Requires neutral wiring and 2.4 GHz Wi-F…
- Control From Anywhere: Monitor your light status. Turn electronics on and off from anywhere with your smartphone using t…
- Voice Control: Enjoy the hands-free convenience of controlling the lights in your home with your voice via Amazon Alexa …
Lighting is where most people start their smart home, and with good reason — it’s the upgrade you interact with dozens of times per day, it requires no wiring or professional installation for smart bulbs, and the automations it enables are genuinely life-improving rather than just novel.
We recommend Kasa smart bulbs over the more commonly recommended Philips Hue for one simple reason: at this stage of your smart home build, Hue’s premium price isn’t justified by the performance difference for white and warm white lighting. The Kasa EP25 bulbs are Matter-certified, work natively with Alexa and all other major ecosystems, have a rated lifespan of 25,000 hours, and cost a fraction of Hue’s starter kit.
What to buy and where to put it:
The 4-pack of Kasa smart bulbs covers your four highest-value fixtures — typically your primary living room lamp, your bedside lamp, your kitchen pendant light if applicable, and one additional location of your choice.
The Kasa smart light switch is for a location where you have multiple bulbs controlled by a single switch — a ceiling light with multiple bulbs, for example. Smart switches are more elegant than smart bulbs for overhead lighting because they allow your physical switches to still work normally, which matters in households with other people who won’t always think to use the Alexa app.
Installation:
Smart bulb installation: Screw in, open the Kasa app, scan the QR code on the bulb packaging. Three minutes per bulb.
Smart switch installation: Turn off the circuit breaker for the switch you’re replacing. Remove the existing switch (two screws, two or three wires). Connect the Kasa switch to the same wires — Kasa’s app provides a wiring diagram for every configuration. Turn the breaker back on. This takes about 20 minutes for your first switch and 10 minutes for subsequent ones. If the word “circuit breaker” makes you deeply anxious, have a handy friend help with the first one.
The automations that make lighting actually smart:
Once your bulbs are in the Alexa app, build these three routines immediately:
Sunrise routine: Set a routine to run 30 minutes before your alarm. Have it gradually brighten your bedroom lamp from 1% to 60% warm white over 15 minutes. This is a wake-up light that costs $0 once your bulb is installed, and it changes how you wake up in a way that’s immediately noticeable.
Away mode: Set a routine to trigger when you tell Alexa “Alexa, I’m leaving.” Have it turn off all lights in all rooms. You’ll use this every time you leave the house and wonder immediately how you survived without it.
Goodnight routine: “Alexa, goodnight” turns off all lights and dims your bedroom lamp to 10% for 30 minutes before turning it off entirely. Pair this with a Sleep sounds skill for white noise and your bedtime routine is mostly automated.
A note on color bulbs: You don’t need them for Phase 2. Color-changing bulbs cost 2–3x more than white/warm white bulbs and the novelty fades faster than you’d expect. Prioritize coverage — lights in every room you use regularly — over color capability in every room. If you want color in one room (typically a living room or entertainment space), add one or two color bulbs in Phase 3 after your foundation is solid.
Phase 3: Smart Plugs & Energy Monitoring
Purpose: Automate everything that plugs into a wall. Understand where your energy is actually going.
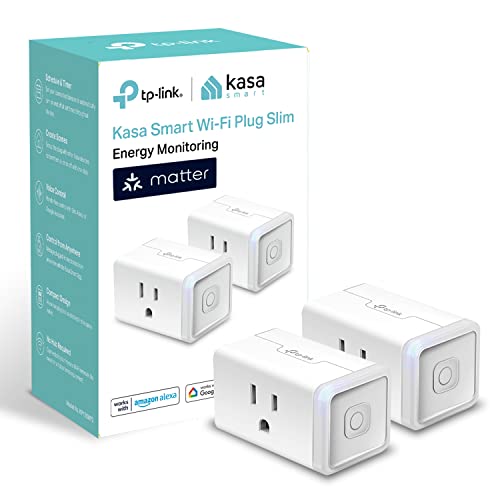
- 【Matter-Compatible Smart Home Integration】Works with Matter-certified platforms such as Apple Home, Amazon Alexa, Google…
- 【Matter: Smooth LAN Control】All Matter-certified devices in your local area network (LAN) will work smoothly even when y…
- 【Energy Monitoring】Tracks energy usage over time to help you understand consumption patterns and make informed decisions…
Smart plugs are the underrated workhorse of home automation. They turn any lamp, fan, coffee maker, space heater, humidifier, or floor lamp into a smart device without replacing the device itself. The Kasa EP25 plugs are Matter-certified, have energy monitoring built in, and are small enough not to block the second outlet.
Where to place your four plugs:
Plug 1 — Coffee maker: This is the plug that converts the most dedicated skeptics. Set a routine to turn on your coffee maker 10 minutes before your alarm. Wake up to coffee that’s already made. This single automation, replicated across millions of smart home owners worldwide, has probably saved more collective human frustration than any other automation category.
Plug 2 — Bedside lamp (if you used your bulb allocation on ceiling lights): Control your bedside lamp from your phone without reaching for the switch in the dark.
Plug 3 — The device you’re most likely leaving on accidentally: Think about what you most frequently remember, while already in bed, that you might have left on. A floor fan in the living room. A space heater in the home office. A string of LED lights on a bookshelf. Whatever your personal “did I leave it on?” item is — put a smart plug on it and that anxiety disappears.
Plug 4 — Your home office or entertainment center: A smart plug on a power strip lets you turn off your entire office setup — monitors, desk lamp, speakers — with one voice command. “Alexa, office off” becomes a real end-of-workday ritual.
The energy monitoring revelation:
Spend one week after installing the plugs just looking at the energy monitoring data in the Kasa app. Don’t change anything yet — just observe. Almost everyone discovers at least one device consuming significantly more power than they expected.
Common discoveries: A gaming PC in sleep mode drawing 40–60W continuously. A cable box that never actually turns off and draws 15–20W 24 hours a day. An old refrigerator in the garage that turns out to be responsible for $30/month of electricity. A phone charger left plugged in all day drawing phantom load.
Once you know where the energy is going, setting schedules to cut power to standby-mode devices during hours when they’re definitely not in use (overnight, during work hours) can meaningfully reduce your electricity bill. Several GadgetCritic readers have reported recovering the cost of their smart plugs within 2–3 months through energy savings alone.
The automation to build in Phase 3:
Away mode expansion: Update your existing “I’m leaving” routine to also turn off all smart plugs. Everything off, one command, before you walk out the door.
Overnight standby cut: Set a scheduled routine at midnight to cut power to your cable box, gaming console, and any other entertainment devices with significant standby draw. Set them to turn back on at 6 AM. Most people never notice this is happening, and it runs silently in the background reducing your electricity bill every single night.
Phase 4: Front Door Security
Purpose: See who’s at your door from anywhere in the world. Know the moment your door opens. Give trusted people access without physical keys.

- Video Doorbell is our second-generation smart security doorbell with up to two years of battery life, an expanded field …
- Last longer with two-year battery life — Experience up to two years of continuous security coverage with three AA Energi…
- See more at your door — Greet guests and watch packages get delivered, day and night, with head-to-toe HD view and infra…
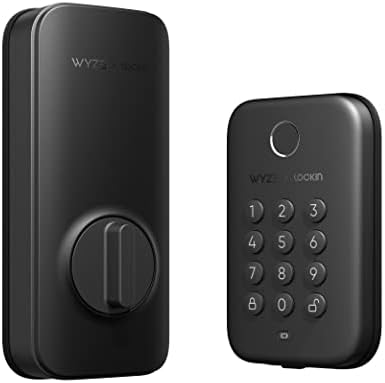
- Fingerprint Unlock: Gone are the days of fumbling for keys. Wyze Lock Bolt recognizes your fingerprint and unlocks the d…
- Numbered Keypad (+ Anti-Peep): Use a code to get in and out. Feel free to create unique codes for each person, so you ca…
- View the lock/unlock history: Bluetooth connection required. Know who came and went in the Wyze app. You can see how it …
Front door security is the phase that matters to people who live alone, parents who want to know when their kids arrive home, anyone who gets packages delivered, and honestly almost everyone once they’ve experienced the ability to see and speak to whoever is at the door from anywhere in the world.
We’re recommending the Blink Video Doorbell at this phase rather than the Ring Pro 2 (which appeared in our top 11 list) specifically because of budget. The Ring Pro 2 is the better device, but at this phase of your build, the Blink covers 90% of the use cases at less than half the price. Blink is an Amazon-owned brand, which means Alexa integration is seamless — when someone presses the doorbell, your Echo devices announce it and you can see the camera feed on your Echo Show if you have one.
The Blink Video Doorbell runs on two AA batteries — no wiring required — and uses 1080p video with night vision and motion detection. The companion subscription is optional: without it, you still get live view and motion alerts. With the $3/month Blink Subscription Plan, you get 60 days of cloud video storage. We consider the subscription worth it for security footage you might actually need to reference.
The Wyze Lock Bolt completes the front door setup. It’s a fingerprint smart lock that attaches directly to your existing deadbolt’s interior thumb turn — no replacement of the entire deadbolt, no drilling, and critically no electrician. Installation takes about 15 minutes and requires a screwdriver. The fingerprint scanner unlocks the door in under a second. You can add up to 100 fingerprints (useful for family members, housekeepers, dog walkers) and manage everything through the Wyze app.
The Wyze Lock Bolt doesn’t have Wi-Fi — it connects via Bluetooth — which means remote access requires the Wyze gateway (a small plug-in device, sold separately for under $20). At this budget level, we’d add the gateway in a future phase and use the lock for fingerprint access now, adding remote control capability later.
The automations Phase 4 enables:
Package notification: Set a Blink motion zone specifically covering the area in front of your door where packages are typically left. When motion is detected in that zone, get a notification. You’ll know the moment your package arrives and the moment it disappears, if anyone takes it.
Arrival announcement: When your front door opens (detected via the Wyze app or a door sensor added in Phase 5), have your Echo announce “Welcome home” or play a specific sound. This sounds silly until you have children who come home from school while you’re still at work and the announcement means you know they’re safe.
Late night alert: Set an alert for any front door activity between midnight and 6 AM. If your door opens at 3 AM, your phone gets a notification immediately. The peace of mind this provides is difficult to quantify.
Phase 5: Climate Control
Purpose: The phase where your smart home pays for itself. Automated temperature control that saves real money on your energy bill while keeping every room comfortable.

- Save up to 23% every year on heating and cooling costs, adjusts to your set schedule to save energy when you’re gone and…
- Compatible with 85% of systems, check your system’s compatibility with our online ecobee Compatibility Checker on the ec…
- Change your temperature by easily tapping the color touchscreen or using the ecobee app. Plus, free software upgrades en…
A smart thermostat is the highest-ROI smart home purchase available. A well-configured smart thermostat typically reduces heating and cooling costs by 10–23% annually. Depending on your current energy bills, this can translate to $150–400 in savings per year — meaning your smart thermostat pays for itself within the first 12 months and continues generating savings indefinitely.
We recommend the ecobee SmartThermostat Essential rather than the Google Nest Thermostat at this phase for one reason: the included SmartSensor. The SmartSensor solves the fundamental problem with single-sensor thermostats — they optimize for the room where the thermostat is mounted, not where you actually spend time. Place the SmartSensor in your most-used room (bedroom at night, living room during the day) and the ecobee will optimize temperature based on where you are, not where the thermostat happens to be.
Installation overview:
Turn off power to your HVAC system at the thermostat or the breaker. Remove your existing thermostat. Take a photo of the wire connections before disconnecting anything. Install the ecobee mounting plate, connect the same wires to the labeled terminals on the ecobee (the labeling makes this very approachable), and snap the ecobee onto the plate. The ecobee app walks you through every step with animated diagrams. Total installation time for a first-timer: 30–45 minutes.
If your existing thermostat has a wire labeled “C” or “Common,” installation is straightforward. If it doesn’t, ecobee includes a Power Extender Kit that works around the missing C wire — this is documented clearly in the installation guide and is more common than you’d think.
The ecobee SmartSensor:
Place it in your bedroom. Set the ecobee’s occupancy schedule to use the bedroom sensor at night (10 PM – 7 AM) and the main thermostat sensor during the day. The thermostat will now heat and cool your bedroom to your target temperature while you sleep, and shift its reference point to the main living area during waking hours. This single configuration change meaningfully improves both comfort and efficiency.
The configurations that save real money:
Away mode: The ecobee app integrates with Alexa and can detect when your home is unoccupied using its built-in occupancy sensor. Configure an eco temperature setback — a range of temperatures that the system allows the home to drift to when nobody’s home, rather than maintaining your comfort temperature in an empty house. A setback of 4–6 degrees during 8-hour workdays represents meaningful energy savings that accumulate daily.
Sleep schedule: Configure a nighttime temperature setpoint that’s 2–3 degrees cooler than your daytime comfort temperature. Most sleep research suggests 65–68°F promotes better sleep quality, and heating your home to 72°F overnight when you’re under blankets is straightforwardly wasted energy.
Pre-conditioning: The ecobee’s Smart Home/Away feature can begin bringing your home to comfort temperature 30 minutes before you typically arrive, so you walk into a comfortable home without maintaining that temperature all day while you were out.
Tying It All Together: The Automations That Make It a Smart Home
At this point you have five phases of hardware installed. What makes it a smart home rather than a collection of smart devices is the routines that connect them. Here are the master routines to build that use everything together.
The Good Morning Routine:
- Trigger: Your weekday alarm time minus 20 minutes
- Actions: Bedroom lamp brightens to 40% warm white → Coffee maker turns on → Thermostat adjusts to morning temperature → Alexa announces weather and first calendar event
The Leaving Home Routine:
- Trigger: “Alexa, I’m leaving” or time-based if your schedule is consistent
- Actions: All lights off → All plugs off → Thermostat sets to away temperature → Front door camera activates motion alerts
The Arriving Home Routine:
- Trigger: Front door opens (Wyze lock or door sensor) or time-based
- Actions: Entryway light turns on → Thermostat returns to comfort temperature → Coffee maker turns on if it’s morning → Alexa announces any pending reminders
The Good Night Routine:
- Trigger: “Alexa, goodnight”
- Actions: All lights off except bedroom lamp at 10% → All plugs off → Thermostat shifts to sleep temperature → Front door locks confirm locked status → Alexa plays white noise for 30 minutes
Common Beginner Mistakes (And How to Avoid Them)
Buying devices from too many brands. Every brand has its own app. Five brands means five apps to manage. Where possible, consolidate — Kasa for plugs and bulbs, ecobee for climate, Blink for cameras. Fewer apps, fewer accounts, less cognitive overhead.
Skipping the naming convention. Name every device consistently from the start. “Living Room Lamp” not “Lamp 1.” “Kitchen Coffee Maker” not “Smart Plug 3.” Alexa uses these names in voice commands and routines. Inconsistent naming creates confusing routines and frustrating voice command experiences.
Building too many automations too fast. Add automations one at a time and live with each one for a week before adding the next. Automation overload — where your home is doing things at times and in ways that feel chaotic — is a real phenomenon and the fastest path to turning everything off and going back to manual control.
Not telling your household. If you live with other people, bring them into the setup. Show them how to use voice commands. Explain what the automations do. A smart home that only one person understands creates friction and resentment. The best household smart home upgrade is the one everyone understands and benefits from.
Neglecting security. Change the default passwords on every smart home device. Enable two-factor authentication on every smart home account. Keep firmware updated — manufacturers regularly patch security vulnerabilities, and ignoring updates means leaving known holes open. Put all your IoT devices on a separate network from your main devices.
What Comes After $500: The Phase 6+ Additions
Once your foundation is solid, here’s where the smart home becomes genuinely impressive.
Smart sensors ($30–80): Door and window sensors tell your home when specific entries are opened. A door sensor on your back door means the lights in the back patio turn on automatically when you step outside. Motion sensors in your hallways and stairways mean lights turn on as you walk through your home at night without ever reaching for a switch.
Smart smoke and CO detectors ($120): The Nest Protect integrates smoke and CO detection with your smart home, sending alerts to your phone and allowing voice alerts through your Echo devices. It also does a “heads-up” early alert before the full alarm sounds — useful for cooking smoke that doesn’t require evacuating.
Whole-home mesh Wi-Fi ($150–250): If you’ve been running the same router since Phase 1, upgrading to a mesh system at this point reduces smart home connection drops significantly and extends reliable coverage to outdoor areas where cameras and sensors often suffer.
Robot vacuum ($250–500): Once your automations are running reliably, adding a robot vacuum that integrates with your away routine — starting a cleaning run every time you leave the house — is the upgrade that produces the most daily tangible benefit. Come home to a clean floor every time you leave.
Smart blinds ($200–400): Motorized smart blinds are the expensive upgrade with the biggest lifestyle impact. Blinds that open with sunrise and close at sunset, that close automatically during peak sun hours in summer to reduce cooling load, and that open with a voice command from bed — this is the upgrade that makes a home feel genuinely futuristic.
The Complete Shopping List
Here’s everything you need for the full five-phase build, organized by purchase order:
Phase 1 — Hub
- Amazon Echo Dot (5th Gen)
Phase 2 — Lighting
- Kasa Smart Bulbs EP25 (4-Pack, Matter)
- Kasa Smart Light Switch ES31
Phase 3 — Plugs
- Kasa Smart Plug Mini EP25 with Energy Monitoring (4-Pack, Matter)
Phase 4 — Security
- Blink Video Doorbell
- Wyze Lock Bolt Smart Lock
Phase 5 — Climate
- ecobee SmartThermostat Essential + SmartSensor
Final Thought
The smart home doesn’t happen in a weekend. The one I’m describing in this guide — the one that actually changes how you live, that you don’t think about managing because it just runs correctly in the background — takes a few months to build, tune, and settle into.
But the version you have at the end of Phase 1? Already useful. Phase 2? Noticeably better. Phase 3? Saving you money. By Phase 5, you’ll walk into a house that wakes up when you arrive, adjusts itself when you sleep, and turns itself off when you leave, and you’ll wonder what exactly you were doing before.
That’s the smart home. Not a demo. Not a party trick. Just a home that works better than the one you had before, for a few hundred dollars and a few hours of your time.
Start with the Echo Dot. The rest follows naturally.
All products tested and verified compatible as of January 2025. Pricing reflects Amazon listings at time of publication. Individual automation capabilities may vary by device firmware version and ecosystem updates.
Affiliate Disclosure
GadgetCritic.blog is a participant in the Amazon Services LLC Associates Program, an affiliate advertising program designed to provide a means for sites to earn advertising fees by advertising and linking to Amazon.com. When you click product links on this page and make a qualifying purchase on Amazon, we may earn a small commission at no additional cost to you. The price you pay is identical whether you arrive through our link or navigate to Amazon directly.
Our product recommendations in this guide reflect genuine editorial judgment based on testing, research, and real-world use. No manufacturer paid for inclusion in this guide. No product was included because of an affiliate relationship — affiliate links are added after editorial decisions are made, not before. Products are recommended because we believe they represent the best choices for the described use case, full stop.